When it comes to seasonal portrait and sprite replacers, most are familiar with complete overhauls like Diverse Stardew Valley – Seasonal Outfits by AirynS and the DSV Team or Seasonal Outfits – Slightly Cuter Aesthetic by Poltergeister. However, there are some gems that may only replace 1 character, and some of those may also be just a file replacement for one of the aforementioned mods, meaning they have to be installed for you to use them.
Why? Well folks, coding a seasonal portrait and sprite replacer isn’t exactly easy, especially for those of us just starting to dip our toes into the modding pool. Thankfully, AirynS has supplied us with a Content Patcher code template to make it a hell of a lot easier.
The Mod

Seasonal Outfit Code Template by AirynS
| Original Upload | January 7, 2023 |
| Last Updated | March 30, 2024 |
| Endorsements | 52 |
| Requirements | Content Patcher, a text editor, your own images as .png files |
A Look Inside…

Set Up
Before We Begin…
When using this template to create your own pack for upload to Nexus or any other site, first and foremost, be sure to credit AirynS for use of their template! Not only is this appropriate, but it also gives the template exposure; the more people see it, the more new content we might get as a result.
Manifest.json
If you’re using this template for your own personal use, changing the manifest.json is not absolutely necessary. However, if you plan to use this template for a mod you are going to upload for others to use, it is mandatory. It is advisable to edit the manifest.json that comes with the template rather than creating a new one as there are some false dependencies included that could prove useful for your mod.
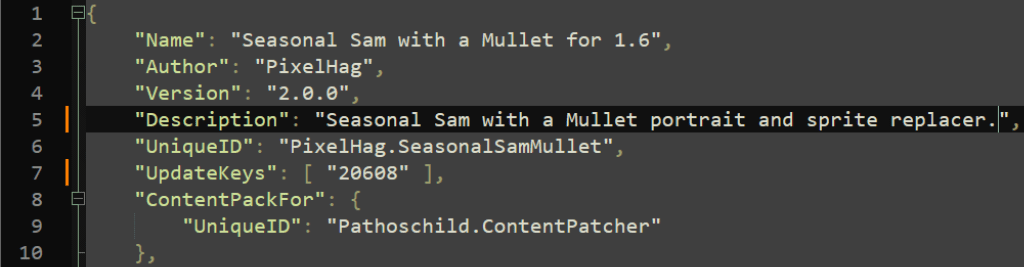
To edit the manifest.json, open it up in your favorite text editor, like the standard Notepad or, my recommendation, Notepad++. For this template, we will only be editing the top portion:

- “Name” – Name of your mod.
- “Author” – Your mod author name.
- “Version” – Version number of your mod. 1.0.0 is a standard first release number, and there are more details about what each number means when talking about a full-on mod. Since we are creating a content pack, I would only worry about increasing the last number for minor fixes and such. You could increase the first number if you make major changes.
- “Description” – A short description of what your mod does. This will show as a tooltip in the GMCM when the cursor hovers over your mod’s name.

- “UniqueID” – Usually a combination of your author name and the mod name, separated by a period (i.e. PixelHag.SeasonalSam).
- “UpdateKeys” – On Nexus, you will be assigned this number when creating your mod page. It will be the number after stardewvalley/mods/ in the mod page’s address. For more info, see the Wiki.
- “ContentPackFor” – This is already set up for Content Patcher, the framework that this template uses to apply it’s effects. This field does NOT need to be edited.
- “Dependencies” – These are the false dependencies I mentioned earlier. This basically tells SMAPI that the template relies on these mods, therefore forcing them to load first, regardless of file order. (If you have Diverse Stardew Valley – Seasonal Outfits or Seasonal Outfits – Slightly Cuter Aesthetic installed it is still advised to disable the character you are creating the content pack for in those mods’ configurations, either through GMCM or the config.json that will be created after starting the game with them installed. Meaning, if you are using the template to make a seasonal Abigail mod, you should disable her in either of the mods mentioned.)
TIP: For more information on manifest.jsons see the Wiki.
Content.json
The content.json is where all the code for the template is contained. Luckily, AirynS has done all of the heavy lifting and very little is required by us.
“ConfigSchema”
This is the only portion of the content.json that requires any editing from us.
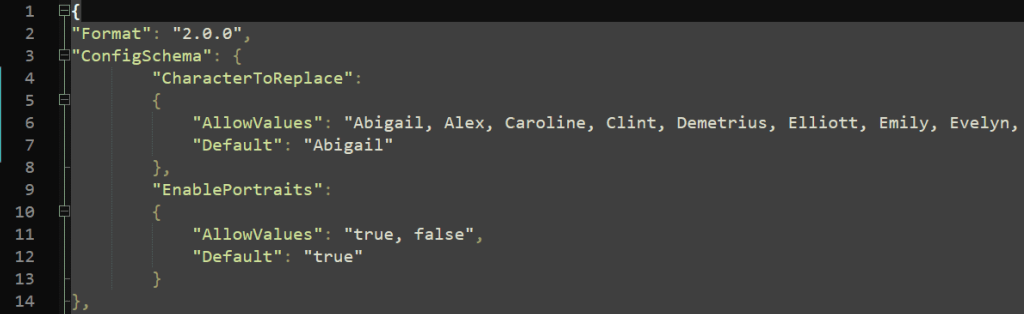
“CharacterToReplace”
- “AllowValues” – By default, this will list all of the NPCs in the game and translates into GMCM as a drop down menu. Technically, you don’t have to do anything here. You can, however, limit this field to only display the character you are replacing. Why? To limit confusion from players who see this menu and try to change it, thinking your mod does more than it actually does. All you have to do is delete all names but the one you are replacing.

- “Default” – The default character that will be affected. You want to put the name of the character you are replacing in quotations here. If you choose not to alter the “AllowValues” in the previous field, this will default the selection to whatever you enter here, but will still allow players to change the selection in the dropdown menu.
“EnablePortraits”
This section is explained on the template’s mod page and has a true/false value. If enabled, portraits and sprites will be replaced. If disabled, only sprites will be replaced.
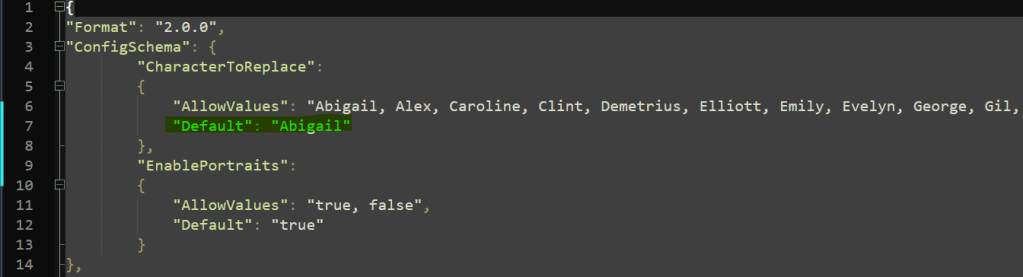
TIP: If you’d like to go the extra mile here, you can add a tooltip to “EnablePortraits” so that players know what disabling the portraits will do.
- On line 12, “Default”: “true” add a comma after “true”.
- Drop down to the next line and add:
"Description": "Disabling will only replace sprites."The result should look like this:
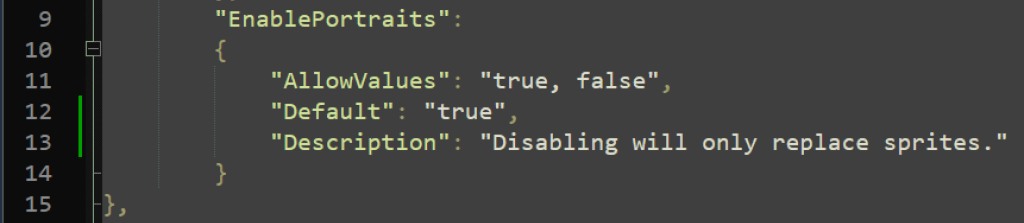

The actual text of what the description says is completely up to you, just make sure it’s in quotations. Additionally, if you have any red flags from SMAPI for a invalid .json, double check that you have added a comma after “true”.
Characters & Portraits Folders
Finally, we need to add our art! For a complete replacement, you will need a sprite and a portrait for each season (including a winter indoor and outdoor), the festivals, the beach, and work (if applicable). The files will need to be named as follows:
| Season/Event | File Name (CharacterName = Character you are replacing, i.e. Sam_Spring.png) |
|---|---|
| Spring | CharacterName_Spring.png |
| Summer | CharacterName_Summer.png |
| Fall | CharacterName_Fall.png |
| Winter | CharacterName_Winter.png |
| Egg Festival | CharacterName_EggF.png |
| Flower Dance | CharacterName_FlowerDance.png |
| Luau | CharacterName_Luau.png |
| Dance of the ML Jellies | CharacterName_Jellies.png |
| Fair | CharacterName_Fair.png |
| Spirit’s Eve | CharacterName_SpiritsEve.png |
| Ice Festival | CharacterName_IceF.png |
| Winter Star | CharacterName_WinterStar.png |
| Winter Indoor | CharacterName_Winter_Indoor.png |
| Winter Outdoor | CharacterName_Winter_Outdoor.png |
| Work | CharacterName_Work.png |
| Beach | CharacterName_Beach.png |
These naming conventions will be the same whether you are naming portraits or sprites. Portraits will be kept in the Portraits folder and sprites in the Characters folder. DO NOT PLACE SPRITES AND PORTRAITS IN THE SAME FOLDER. The files are named the same and placing portraits and sprites in the same folder will just result in you replacing files over and over.
Result
After what is essentially a quick and painless set-up, you should now have a working seasonal portrait and sprite replacement for Content Patcher. If you would like to see some examples of how others’ have used the template, there are several listed on the mod’s description page as well as my own mod, Seasonal Sam with a Mullet for 1.6.
Don’t forget to give AirynS some love for this one! This template is such a time saver and HUGE help to those of us just getting started in modding. Check out their other mods as well!
As always, thanks for stopping by! Questions, comments, and suggestions are welcome and appreciated. Happy gaming!


Leave a comment